The most effective way to smooth the surface of an ABS print is with acetone. Acetone will melt the plastic and let the surface flow and even out, eliminating layer lines. It can be a little challenging however. If you dip the model, you can get bumps where the acetone drips off. If you submerge it too long, the acetone can get inside and quickly melt all the fill, causing the model to collapse or remain soft for a couple of days. You can brush it on and easily create a glossy finish (with glossy layer lines). Melting it enough to remove the layer lines can be difficult without leaving brush marks.
The most effective method I have found is with vapor. Stratasys has a smoothing station for finishing ABS parts from their pro level printers that uses this method. The acetone (or other solvent) is heated until it boils creating a pool of heavier-than-air vapor. The part then gets lowered into the vapor for 30-40 seconds. The warm solvent vapor condenses on the room temperature part, coating it more evenly than a brush can, and thinly enough to be controlled.
If the idea of boiling acetone seems scary, you can try this at room temperature with about 1/2 inch of acetone at the bottom of an empty paint can. Simply place the model on some kind of metal stand in the can and leave it for a few hours, hoping you don’t leave it too long. This is the first approach I tried.
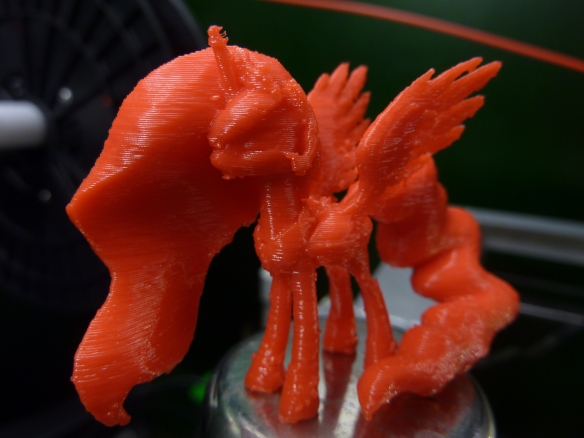
 This was the result of an hour or so in the can. The plastic has become glossy, but there isn’t any noticeable melting.
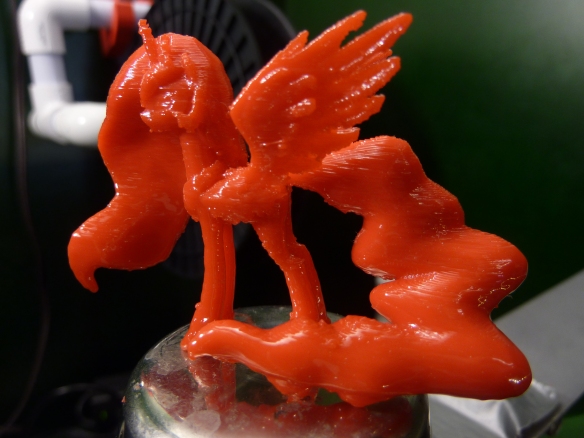
 This was about 3 hours later. You can see that it is almost completely smooth at the bottom, but the lines are clearly visible at the top. It is sitting on an overturned 2oz cup, which places it about 1″ above the acetone. There is clearly a significant difference in the density of the vapor between the bottom and top of the model.
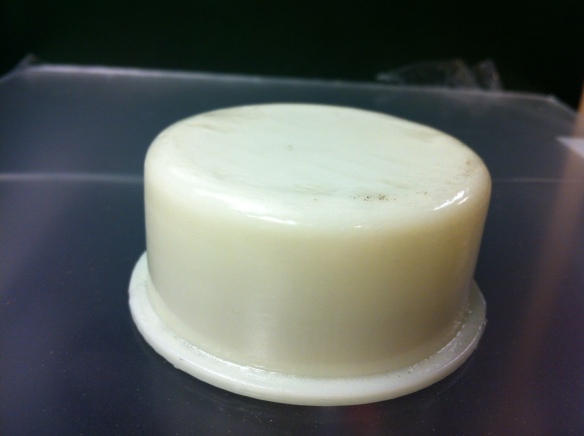
 After another four hours, the model is completely smooth. This was allowed to dry out between steps. The first test had been a Yoda left in overnight, and it melted so much the head fell off. Smoothing can be done this way, but it takes a very long time, and there will be a much greater loss of detail at the bottom.
I decided the best results will come from boiling the acetone and creating a pool of vapor dense enough and deep enough to allow exposures short enough to judge and control the amount of smoothing. Stratasys’s smoothing station is based on vapor degreasers, which use solvent vapor to clean electronics and other parts. They include a pool of heated solvent, a chamber to hold the vapors, and a condenser coil along the top. The condenser creates a layer of cool air which will condense and contain any vapor that rises into it.
Here is a homemade version of one-
 There is a steel pot placed in a larger tub. Acetone goes into the steel pot, where it is heated by boiling (or very hot) water poured into the outer tub. Acetone boils at 134F, so not much heat is needed. In this photo there is a small pot placed into the acetone which provides a place for the model that is lower than the surface of the solvent. Using something like a steamer rack above the acetone would work well too. Next to the pot is a tub of ice water with a fountain pump running water through a copper coil. It would have been neater with a smaller diameter pipe, but this provided an easy connection to the pump.
Much is made about the flammability of acetone vapor. With this method, the only nearby ignition source would be the pump, which is submerged. While it is setup outside to provide maximum ventilation, I still recommend using a respirator while working with it.
This method works best on models printed with .2mm or .1mm layers. Some sanding in advance is a good idea as well. The less the surface has to be melted to remove the layer lines, the more detail and edges will be preserved. Set or dangle the model in the vapor for about 30 seconds at a time. When you pull it out, there will be some melting already visible. It will continue to smooth as it dries, so it might take 20 minutes before the effect can really be judged. Let it dry for 30 minutes or so to avoid over melting. Two 30 second exposures will often be enough to completely smooth a model.
Before smoothing, sand down any blobs, bumps or strings because those will still remain as bumps on the smoothed surface.


Great work. I experimented with spraying acetone through a preval can. Worked ok, but wasted too much gas, which gets expensive.
I tried the preval as well. It’s gentler than brushing, but it seemed to me that the acetone was evaporating before it had a chance to do much to the plastic. The nice thing about the vapor is that the model is submerged, and the acetone that condensed won’t be able to leave the surface until you pull it back out.
If I have just one thing that is only going to take a couple minutes total, I have been foregoing the condenser. The condenser is good for saving solvent, but acetone isn’t all that precious. I definitely use a respirator in that case. When the coil is running, you can put your face right over the pot and not smell any acetone at all. Without the coil the smell is very evident, and you should certainly be wearing a respirator when pouring the acetone back into the can. The vapor will be pouring out as well so it should be done outside well clear of any potential sparks.
People really seem to love your work (as I do). Please join us on Google+ 🙂
https://plus.google.com/u/0/116416453568555193309/posts/XtqjnJNmBdB
Where did you get the Celestia model?! My girlfriend is a massive MLP fan and this could be a nice surprise for her! Are there any other models that you know of that I could use?
I wonder if using acetone in a pump spray bottle would be economical and functional? Like the ones made for spraying fine mist cooking oils.
How to get the same result for PLA prints ?
There isn’t really. There is some other solvent that can work with PLA, but I don’t remember what it was, other than it isn’t the sort of thing to be messing with at home.
Methylene Chloride (Dichloromethane)
Nasty stuff though, now banned from sale in the EU but used to be found in paint strippers (no idea about elsewhere but presumably also hard to get hold of)
http://www.protoparadigm.com/blog/2013/06/vapor-smoothing-and-polishing-pla-with-tetrahydrofuran-thf/
Bit late on this, but you can smooth PLA using MEK/MEK Substitute, which can be bought as paint thinner at any major hardware store (like Home Depot).
Pingback: IndieGoGo Campaign The Touch-Up Promises to Smooth 3D Printing
To prevent the printhead from dragging across the build platform throughout the initial oriented methodology, use the Pronterface controls to maneuver the build platform down faraway from the printhead before beginning a print. Make sure your filament runs freely by keeping it neat and tidy on the spool. Keep the filament free from tangles by preventing it from unraveling from the spool.