Once you get your extruder calibrated, you know that the right amount of plastic is going in, but you still need to make sure that the right amount of plastic is coming out. Slic3r will run the extruder at the speed that it has calculated will deliver the right amount of plastic to create the thread width it has planned for. However the real world doesn’t always match up to those calculations.
When you are printing at .3mm layers, a good Width over Thickness Ratio is 1.4, meaning the thread is 1.4x wider than its height. This would be .42mm, and if the flow setting is right, the printer should be delivering threads at this width. Simply running the extruder and measuring the filament that comes out isn’t enough, because the thread is shaped by getting pushed down onto the layer below it.
The best way to check that a given flow rate is delivering the right amount of plastic is to print a single walled part. Pick something like a cube, and slice it with settings for one perimeter, 2 solid layers and 0 fill. When it prints, the walls of the cube should be no thicker than a single thread.
 Under Layers and Perimeters, set the minimum perimeters to 1, and the layer height to .3. Make sure the “Generate extra perimeters when needed” is unchecked, or else every few layers Slic3r will throw in an additional perimeter. Set Solid Layers to at least 2. You can discount the first layer because that is affected by the Z offset, but you want to see it run at least one solid layer on top of that to judge how well the threads are fitting together.
 Set the fill density to 0, so nothing gets in the way of measuring the wall.
 Under Advanced, set the Default Extrusion Width to .42. Slic3r can calculate this automatically, but if we set it explicitly, we will know what width we are looking for.
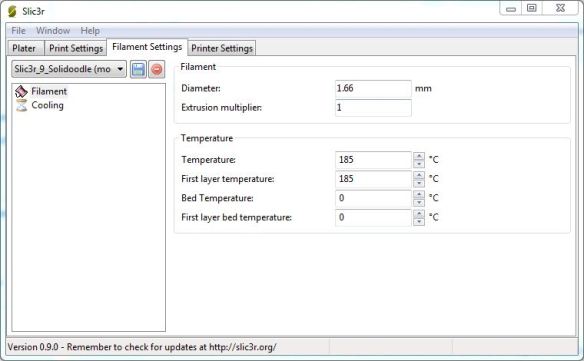
Extrusion Multiplier should be set to 1. This is where you make adjustments in case the flow calculations are not quite correct. We will see how it prints at 1, and then change it if needed.
Print the cube and stop it before it begins printing the solid layers for the top. Find the most perfect, best aligned wall and measure it with a caliper.
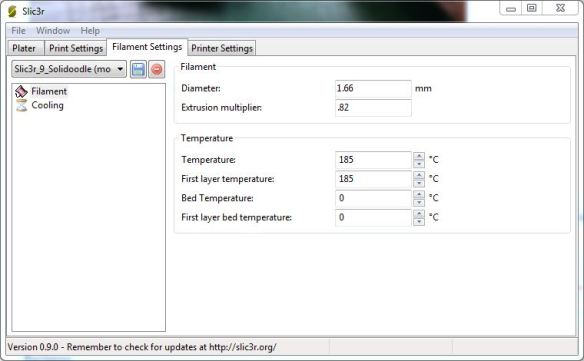
 The first try came out to .51, which means too much plastic is getting extruded. It’s a small difference, but if you want to make high resolution prints at a .1mm layer height it can become noticeable. Our target of .42 is about 82% of .51, so set I set the Extrusion Multiplier to .82. This will tell Slic3r to scale back the results of its computations by 82%.
In Skeinforge, this is a matter of adjusting the Flow Rate under the Speed tab. You could try changing the current setting by the same percentage as calculated above. For instance if my setting in Skeinforge was 2.7, I could try dropping it by 82% to 2.21. I haven’t tried it with Skeinforge to see how well it works, but I suspect it would take a little more trial and error.


Great blog Ian! Is there anywhere I can get your skic3r settings? When I use slic3r the dimension shown in Pronterface is waay off… Havent got my printer yet, but it seems strange if I compare with the result Skeinforge gives me. Skeinforge take such a long time to do its job, though..
In the start.gcode, before every print, the printer is commanded to go 200mm to x, 200mm to y, and -200mm to Z. Before it gets that far, it will hit the endstops and move on to the next command. Pronterface doesn’t know about the endstops, it thinks the printer will have actually gone that far, so it reports a much larger dimension than reality.
Did you end up adjusting the motor steps for x and y after you made up your jig to check how far they actually travelled? if so, could you please give me a quick run down on how you adjusted the steps? im comfortable with how to check the travel, just not with modifying the code…What sort of affect did it have on print quality etc? Thanks, Keep up the awesome work!
The adjustment is the same as I outlined in the extruder calibration blog. Multiply the steps/mm by the amount you commanded to get the total number of steps the motor turned. Divide the total steps by the amount it actually moved to get the correct steps/mm. I think I ended up changing mine from 88 to 89.11 for Y.
Depending on the way plastic actually gets extruded, this may or may not give you exact final dimensions. Mine are running around .1mm over, but it is hard to measure more accurately than that. Bumps, oversized corners, squished first layers, etc can make it hard to find a measurement that is an accurate representation of a dimension. I think the value of calibrating X and Y is more in making sure that they are consistent with each other, and that squares are square and circles are round. Then if you need to tweak the steps again to hit expected dimensions, the right relationship between X and Y can be maintained while you do so.
Pingback: Repetier and Skeinforge 50 | Solidoodle Tips
Pingback: Defining your Slic3r Settings for Silkworm | Silkworm
Nice explanation, I followed your directions, I too had an EM of .82.
However, the top and bottom infill now leaves gaps between the threads of filament.
Did you had the same problem? I now have my infill width increased to + – 0.6mm It seems to solve the problem.
I had a similar problem but (using Slic3r) I upped the “Infill” to 120% which filled any holes.
Pingback: Extruder Calibration | Building a 3D Printer
Thank you so much for this post. I’ve gone through the Slic3r is Nicer calibration but I’ve been searching for a better way to calibrate the extrusion and this is it!! Great stuff, keep up the great work.
this works for both PLA 3mm and 1.75mm?
any suggestion for the speed settings?
thkss!
What size is your nozzle?
My nozzle is .35
This is an old post but I thought I’d clarify some stuff for Skeinforge. In the Dimension tab there is a Filament Packing Density setting, which is the equivalent of the Extrusion Multiplier for Slic3r, except reversed. So a 0.8 multiplier for Slic3r translates to a 1.2 packing density for Skeinforge. Flow rate and Feed rate in Skeinforge should be the same.
Also, when you’re setting the Edge Width over Height ratio in the Carve tab of Skeinforge, you need to go to the Inset tab and set the Infill Width over Thickness to be the same.
Pingback: Getting started with RepRap : 3D Genius – The Home of 3D Printing
Thanks Shameless for the explanation! It’s usefull to know for those who are intended to try out Slic3r first then move to Skeinforge for the finnest tunes…
I would add, thought, that it’s not the same to multiply over 1.2 than over 0.8 (1*1.2*0.8= 0.96)